Crafting Cherry Wine: A Step-by-Step Guide
Crafting cherry wine in your own home connects you to one of nature’s most vibrant fruits in a way that store-bought wine simply can’t match. The first time I transformed a basket of plump, sun-ripened cherries into a ruby-red elixir, I was amazed by how the humble cherry could create something so elegant. That transformation — from fruit to wine — remains one of the most rewarding processes in my garden-to-glass journey.
Many home winemakers shy away from cherry wine, assuming it’s more challenging than grape varieties. I’ve found the opposite to be true! Cherry wine welcomes beginners with its forgiving nature while offering enough complexity to keep experienced winemakers engaged. The secret lies in understanding how this particular fruit interacts with the fermentation process, and how naturally occurring compounds can be your allies rather than obstacles.
My sustainable approach to winemaking has taught me that cherries offer something truly special. They bring their own unique character to your carboy, and with the right techniques, you’ll capture that perfect balance of sweetness, tartness, and depth that makes cherry wine so beloved.
The Joy of Sustainable Cherry Winemaking
Before diving into equipment and processes, I want to share why cherry wine holds a special place in my sustainable winemaking heart. Cherries are surprisingly resilient fruits that often grow abundantly in many climates with minimal intervention. When I first planted my own cherry trees seven years ago, I was thinking only of pies and preserves — wine wasn’t even on my radar!
But nature has a way of overwhelming us with its generosity sometimes. After my third summer of cherry abundance, I needed new ways to preserve the harvest. That’s when I turned to winemaking, and I’ve never looked back.
What makes cherries particularly wonderful for sustainable winemaking?
When we make wine from cherries, we’re participating in a beautiful cycle. The trees convert sunlight into fruit, we transform that fruit into wine, and the remains nourish the soil for next year’s growth. It’s this kind of closed-loop thinking that forms the foundation of truly sustainable winemaking.
What You’ll Need: Gathering Your Supplies
Before starting your cherry wine adventure, let’s assemble everything you’ll need. I’m a firm believer in being prepared before the first cherry is pitted — there’s nothing worse than being halfway through processing your fruit only to realize you’re missing a crucial tool!
Essential Equipment:
Ingredients:
Wait, is that pectic enzyme truly necessary? Truth be told, I was resistant to using it when I first started making fruit wines, wanting to keep everything completely natural. My early batches were delicious but always a bit cloudy. After experimenting, I’ve found that a minimal amount of pectic enzyme gives clearer wine while still honoring sustainable principles. This is one of those rare compromises I’m comfortable making for quality.
 Crafting Cherry Wine: A Step-by-Step Guide
- Crafting Cherry Wine: A Step-by-Step Guide
- Crafting Cherry Wine: A Step-by-Step Guide
- Crafting Cherry Wine: A Step-by-Step Guide
Sarah’s Secret: Cherry Selection Strategy
People often ask me which cherries make the best wine, and my answer surprises them: the best wines come from mixing varieties! This insight came from a happy accident during my third season of winemaking. I had both sweet Bing cherries and tart Montmorency varieties ripening simultaneously and decided to combine them rather than make separate batches.
The result was magical — the sweet cherries provided body and alcohol potential, while the tart varieties contributed complexity and balanced the sweetness perfectly. If you can find them, I particularly recommend this mix:
However, work with what’s available locally and in season. Remember that truly sustainable winemaking means using what your local environment provides rather than shipping ingredients across continents!
Step-by-Step Cherry Wine Process
Day 1: Preparation and Primary Fermentation Setup
- Sanitize Everything: Before touching a single cherry, sanitize all equipment thoroughly. I use a solution of 1 tablespoon of potassium metabisulfite dissolved in 1 gallon of water, soaking each piece of equipment for at least 2 minutes. This natural sanitizing approach prevents harmful bacteria while avoiding harsh chemicals.
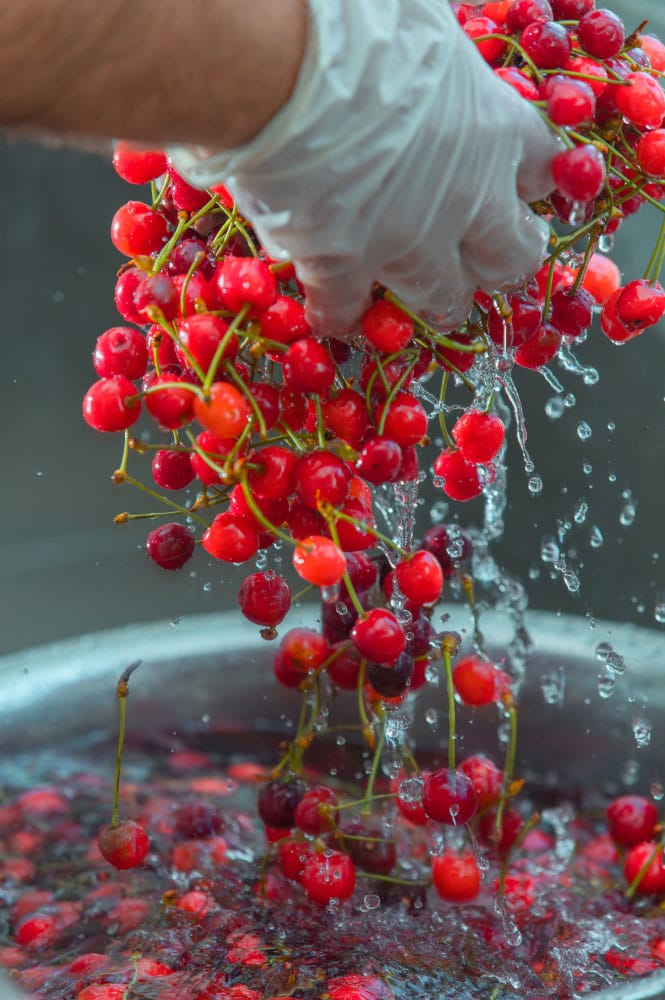
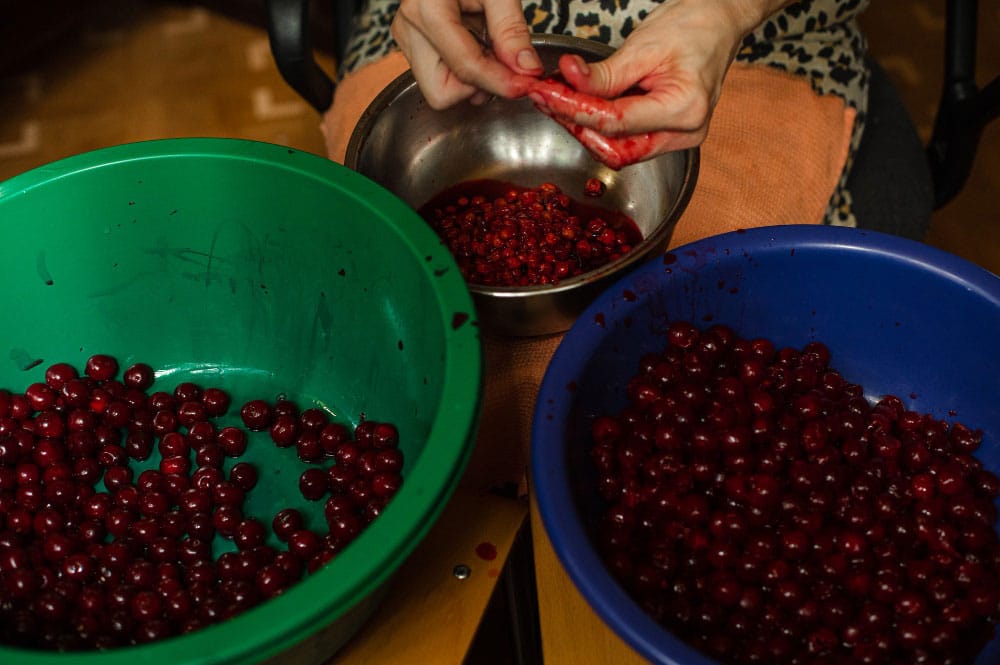
- Process Your Cherries: Wash the cherries thoroughly, then remove stems and pits. The pits contain compounds you don’t want in your wine, so be thorough here! Place the pitted cherries in your sanitized mesh bag within your primary fermenter.
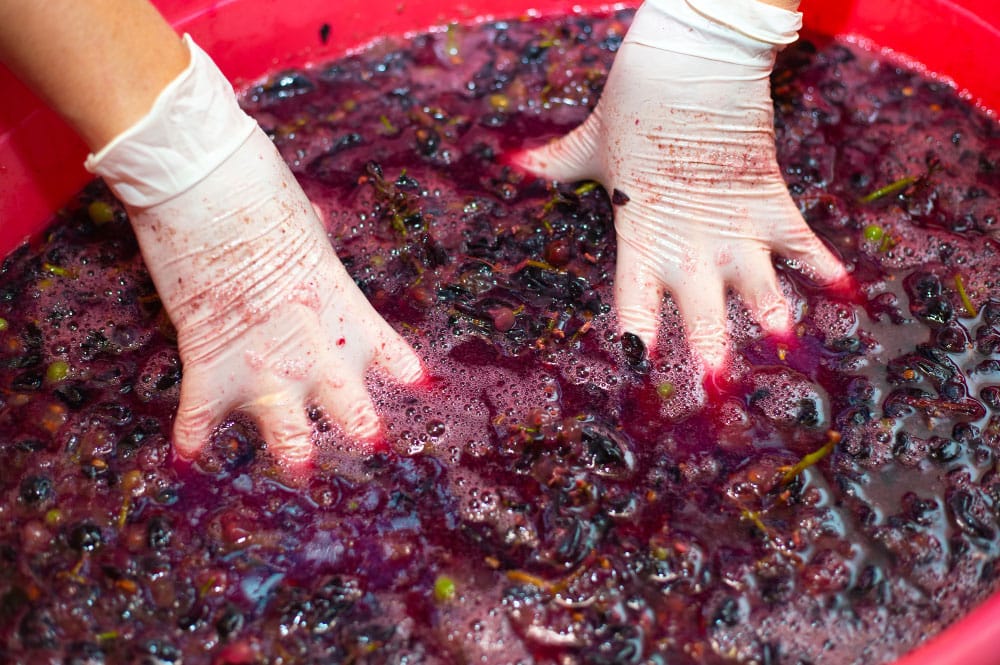
- Crush the Fruit: Here’s where we connect with countless generations of winemakers before us! With thoroughly washed hands, gently crush the cherries in the mesh bag. I find this moment meditative — the fragrance of fresh cherries rising as their juice begins to flow feels like a conversation with the fruit. Don’t pulverize them; a gentle crush releases enough juice while keeping some texture for the yeast to work through.
- Create the Must: Dissolve your sugar in about 7 pints of water that’s been boiled and cooled to room temperature. Pour this over your crushed cherries. Stir in the acid blend (if using), yeast nutrient, and crush one Campden tablet to add to the mixture.
- Initial Measurements: Use your hydrometer to measure the specific gravity, which should ideally be between 1.085 and 1.090. This will give you a finished wine of approximately 11-12% alcohol. Record this number in your winemaking journal! I’ve learned the hard way that memory isn’t reliable enough when tracking multiple batches.
- Rest Period: Cover the fermenter loosely with a clean cloth secured with a rubber band or use the lid set loosely (not sealed). Let this sit for 24 hours, which allows the Campden tablet to dissipate while beginning to extract color and flavor from the cherries.
Day 2: Beginning Primary Fermentation
- Add Pectic Enzyme: Stir in 1/2 teaspoon of pectic enzyme. This helps break down the fruit’s cell walls and will result in better juice extraction and a clearer final wine.
- Wait 12 Hours: Give the pectic enzyme time to work through the must before adding yeast.
- Prepare Yeast: About an hour before adding to your must, prepare your yeast according to package directions. Typically, this involves rehydrating in warm water (around 104°F or 40°C).
- Pitch the Yeast: Add your prepared yeast to the must, stir gently with a sanitized spoon, and cover again with the cloth or loose lid.
- Daily Management: For the next 5-7 days, you’ll need to:
- Stir the must twice daily with a sanitized spoon
- Gently push down the fruit bag to keep it wet (this prevents mold and maximizes extraction)
- Monitor the temperature (ideally between 68-75°F or 20-24°C)
- Watch for active fermentation signs (bubbling, frothy surface, rising fruit bag)
I used to think stirring twice daily was excessive until I noticed how much more vibrant the color and flavor became with regular agitation. This is one of those areas where diligence really pays off!
Days 7-10: Transition to Secondary Fermentation
- Check Specific Gravity: When fermentation slows (typically after 5-7 days), check the specific gravity. You’re looking for a reading around 1.010-1.020.
- Remove Fruit Solids: Once you reach this gravity range, it’s time to remove the fruit solids. Lift out the mesh bag, allowing it to drain naturally (no squeezing, which can add astringency). This is where patience becomes your friend — let it drip for a good 15-20 minutes.
- Transfer to Secondary: Using your sanitized siphon, transfer the liquid to your glass carboy, leaving behind any sediment at the bottom of the primary fermenter. Now it’s time to say goodbye to all that headspace that allowed for vigorous primary fermentation.
- Top Up: Add filtered water to bring the level to within 2 inches of the carboy opening. This reduction in headspace helps protect your developing wine from oxidation.
- Add Airlock: Secure the airlock and bung to create a sealed environment that allows carbon dioxide to escape while preventing oxygen and contaminants from entering.
Months 1-3: Aging and Clarifying
- First Racking (After 3-4 Weeks): Once fermentation is complete (specific gravity reads 0.998-1.000 consistently for three days), it’s time for the first racking. Siphon the wine into a sanitized carboy, leaving the sediment behind.
- Second Racking (After 2 Months): Repeat the racking process to remove any additional sediment that has settled.
- Taste Test: Now comes one of the most enjoyable parts of winemaking — the first real taste test! At this point, you can assess:
- Sweetness/dryness (is more sweetening needed?)
- Acidity (is it balanced or needs adjustment?)
- Body and mouthfeel (is it thin or full-bodied?)
- Optional Adjustments: Based on your taste test, you may want to:
- Add more sugar if too dry (create a simple syrup with 2 parts sugar to 1 part water, boiled and cooled)
- Add acid blend if too flat
- Add a touch of cherry juice concentrate for more intense flavor
Remember that any addition means you’ll need to add another Campden tablet and potentially wait longer before bottling. I once got impatient and bottled too soon after adjustments — only to find my corks popping out a week later as fermentation reactivated! Lesson learned.
Month 4: Bottling
- Final Clarification Check: Your cherry wine should be brilliantly clear by now. If it still appears cloudy, you may want to use a natural fining agent like bentonite clay.
- Stabilization: Add one crushed Campden tablet per gallon and 1/2 teaspoon of potassium sorbate to prevent renewed fermentation, especially if you’ve sweetened the wine.
- Wait Two Weeks: This ensures the stabilizers have time to work and any final sediment can settle.
- Bottling Day: Sanitize your bottles, corks, and all equipment. Siphon the wine into bottles, leaving about 1.5 inches of headspace. Cork immediately after filling each bottle.
- Label and Store: Create labels with the wine type and bottling date. Store bottles on their sides in a cool, dark place.
Aging and Enjoying Your Cherry Wine
Cherry wine improves dramatically with aging. While it’s tempting to dive in immediately, try to wait at least these minimum periods:
I’ve found that properly made cherry wine peaks at about 18-24 months, though I rarely have enough willpower to save bottles that long! The transformation is remarkable — harsh edges soften, fruit notes deepen, and a complexity emerges that simply isn’t present in young wine.
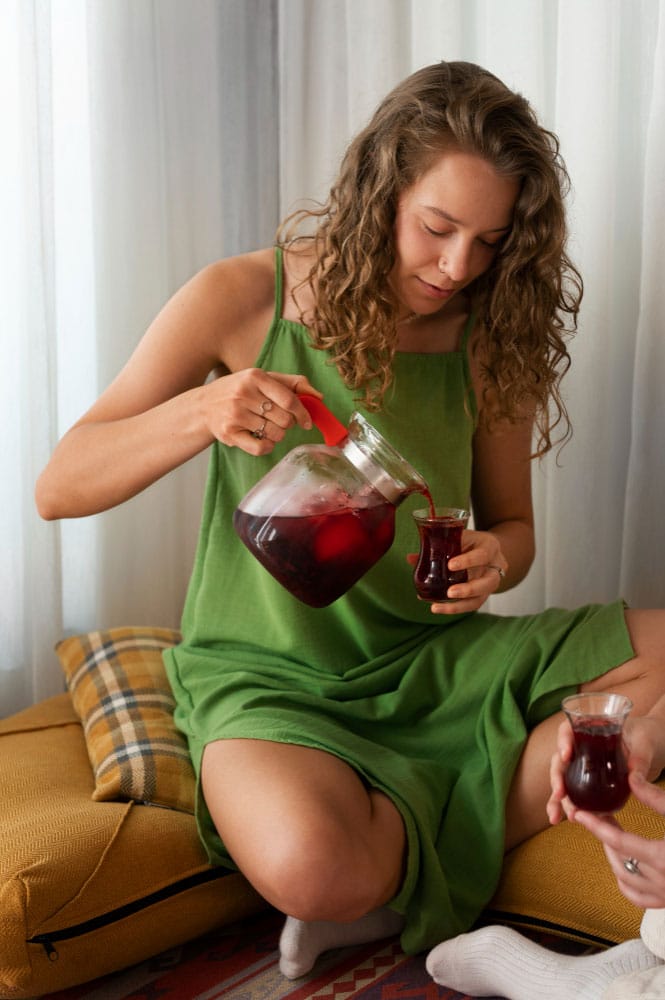
When serving, cherry wine shines at slightly below room temperature — around 55-60°F (13-15°C). This is cooler than you’d serve red grape wine but warmer than a standard white wine. This temperature allows the cherry aromas to fully express themselves without the alcohol overpowering the fruit character.
My favorite pairings include:
When Things Don’t Go As Planned
Winemaking is part science, part art, and occasionally part mystery. Even after all these years, I sometimes encounter challenges. Here are solutions to common cherry wine problems:
Problem: Fermentation doesn’t start within 48 hours
Problem: Wine remains cloudy after months
Problem: Wine tastes too acidic
Problem: Too much “cherry pit” flavor (bitterness)
The Natural Connection
As I wrap up this guide, I want to emphasize the beautiful connection we make with nature through winemaking. When we create cherry wine, we’re not just making a beverage — we’re preserving a moment in time. That summer sunshine, those orchard breezes, the bird songs during harvest… all become part of the story in your glass.
The sustainable approach isn’t just about avoiding chemicals; it’s about respecting the inherent wisdom in natural processes. Fermentation itself is one of nature’s most miraculous transformations, and our role is simply to create the right conditions for that magic to unfold.
I hope your cherry winemaking journey brings you the same joy and connection it has brought me over the years. There’s something profoundly satisfying about sharing a glass of homemade cherry wine with friends and saying, “I made this from cherries in my garden” or “from cherries I picked at a local orchard.” That connection to place, to season, to the earth itself — that’s what sustainable winemaking is truly about.
The Secret of Microbial Terroir in Cherry Wine (Sarah’s Exclusive Discovery)
This is something I’ve been researching for the past three years, and you won’t find it on other winemaking sites yet — the profound impact of natural microbial terroir on cherry wine character. While grape winemakers have long understood that native wild yeasts contribute to regional wine characteristics, cherry winemakers are just beginning to explore this fascinating dimension.
Understanding Cherry-Specific Microbiome
Unlike grapes, cherries host a unique microbiome that includes:
Through careful experimentation in my home lab (yes, I have a microscope next to my carboys!), I’ve discovered that allowing controlled native fermentation for the first 24-48 hours before adding commercial yeast creates layers of complexity impossible to achieve otherwise.
My Hybrid Fermentation Method
Here’s my exclusive technique that combines natural terroir with controlled fermentation:
Creating Your Own Cherry Wine Terroir Map
I’ve developed a simple system for tracking your local cherry wine terroir:
Environmental Factors to Record:
Sensory Profile Documentation:
After three years of detailed documentation, I can now predict with surprising accuracy how cherries from different locations in my area will express themselves in wine. My east orchard cherries consistently produce more floral notes, while the south-facing trees yield fruit that creates spicier, more complex wines.
The Sustainable Advantage
This approach isn’t just about creating unique wines — it’s deeply sustainable:
The most exciting discovery? When I shared bottles from my terroir experiments at our local wine club, experienced tasters could actually identify which part of my property the cherries came from! This level of site-specific character in fruit wines is virtually undocumented in home winemaking literature.
Your Terroir Challenge
I encourage you to start your own terroir experiments. Begin with a split batch:
You’ll be amazed at the difference. This is cutting-edge home winemaking that honors both tradition and innovation — the perfect expression of sustainable practice!
Now, with sanitized equipment and cherries in hand, you’re ready to begin your own cherry wine story. I’d love to hear how it unfolds! Share your experiences in the comments below.


